How to Make a Sock Puppet
In an effort to amaze my children with my puppet making abilities I made this puppet from one of my old socks and now I am going to show you how I did it. You can watch the video or follow along with the pictures below.
The only tools needed for this project are a scissors, and a heat gun.

The main ingredient of this puppet is a sock, pick a sock that fits your hand and has some nice puppet like texture. Be careful not to pick a sock you are going to miss, as I did. I used one of my old sock and I love the puppet is has become, but I have to admit I also miss my socks.
The other materials I used are some felt, an old cereal box, a couple googly eyes and 2 wooden balls.
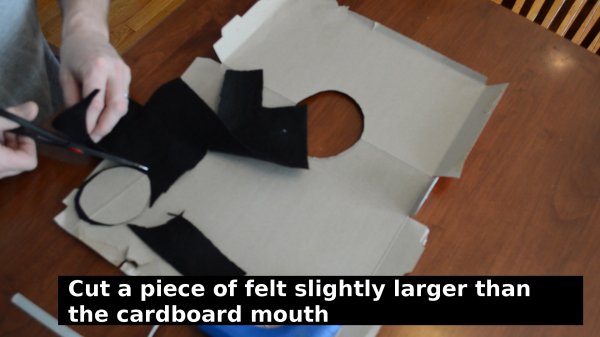
To start I flattened a cereal box and traced my fingers on one of the seams to make the shape of a mouth. I am using the cereal box paperboard to stiffen the mouth so it’s not as floppy as the rest of the sock. Test fit and trim the paperboard as needed.

After doing some final trimming to size I then cut a piece of felt slightly larger than the cardboard mouth. I then used my hot glue gun to glue the felt to the the paperboard mouth.
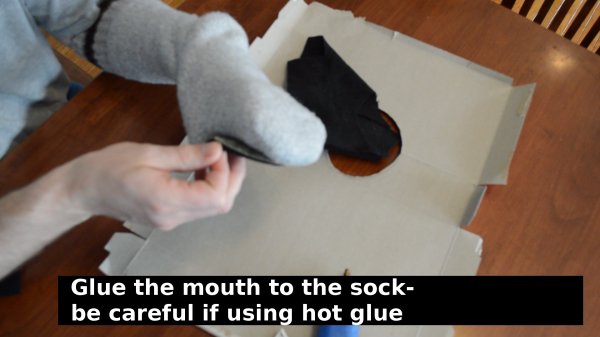
Again I did a little test fitting and finally it’s time to glue in the mouth. I applied glue to the back of the mouth and held it in position till it was dry. Now this was a thick sock that isolated my hand from the hot glue. I would not attach the mouth this way with a thinner sock, I would have either used a lower temp glue or not have my hand so close to the hot glue.
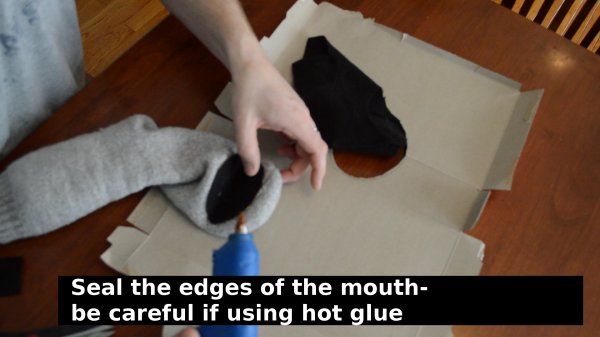
I apply a seam of glue around the mouth to keep looking good and not show the layer of felt or paperboard.
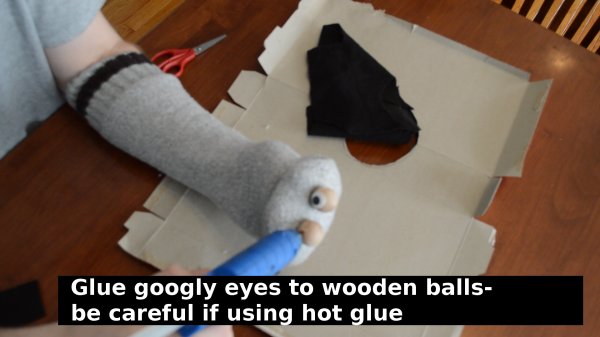
Now the finish touch is the eyes. I had 1” wooden balls in my pile of craft parts so I used those, I was originally looking for ping pong balls. I glued the wooden balls on the top of the puppet, by just shooting some hot glue on the sock and then pressing the ball on.

The googly eyes went on much the same way. As you can see a little glue and stick on a googly eye.
And that’s it the puppet is complete. Very simple but I like it. And, I assume that sooner or later my kids will stop being annoyed as I walk around the house talking in puppet voices.
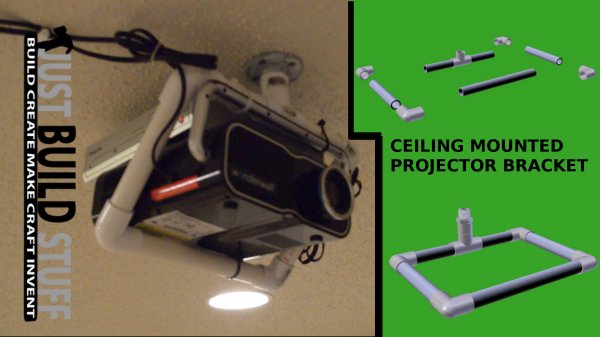
DIY Ceiling Mounted Projector Bracket Made from PVC
February 23, 2015 by Kurtis
Filed under build, featured, Made From PVC, Maker DIY
This is a video of how I made a simple ceiling mounted projector bracket out of PVC pipe.
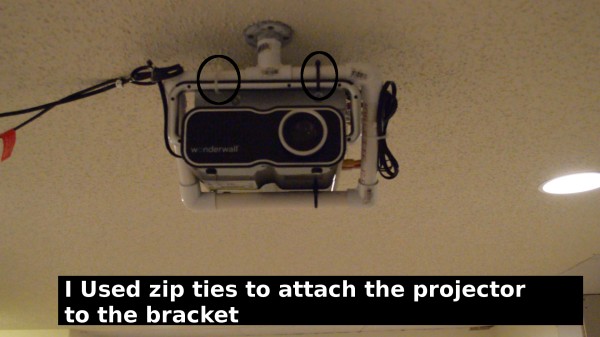
I purchased an inexpensive Sharper Image Wonderwall projector on ebay and I wanted an easy and inexpensive way to mount it. I rounded up the pvc parts I had in my garage and came up with this projector bracket. The Wonderwall projector is very light, if you have a heavy projector I would not recomend trying something like this.
Link to watch video on youtube.
An excel file with links to buy the parts at Menards is attached below.


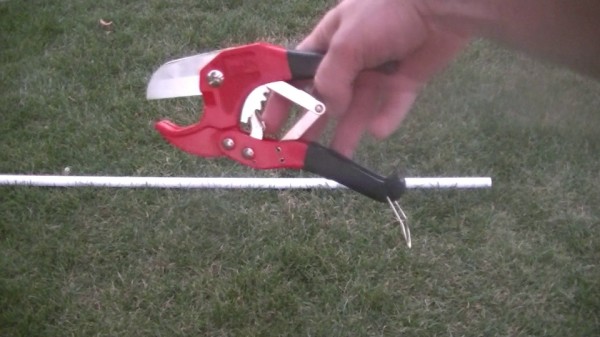
Use a PVC pipe cutter to cut PVC pipe to correct lengths.
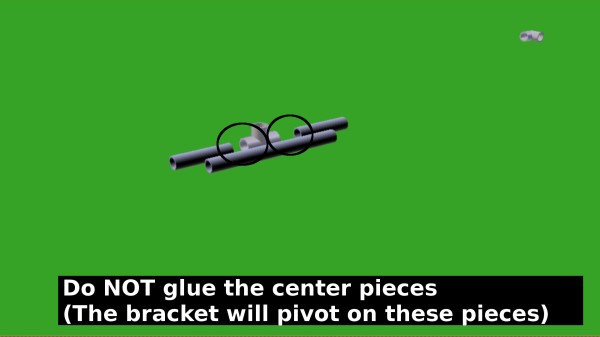
Slide the 2 4.25″ pieces into the tee fitting. Do not glue them, this is where the bracket pivots.
Glue the 4 elbow fittings to the pipes. In this situation I used super glue to glue all the joints as I do not care if the joints leak, I only care they are bonded well.


Screw the projector bracket into the ceiling. Take care to find a stud or ceiling beam, drywall and most ceiling panels will not support the weight of a projector. Also make sure you are not screwing into wires, pipes, ducts or anything else in the ceiling.

I used cable ties to attch the projector to my pvc bracket.
How to Make Beeswax Wood Finish
January 31, 2015 by Kurtis
Filed under build, featured, Refinish/Remodel, Woodworking
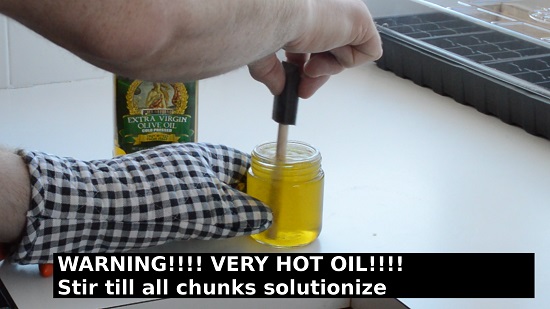
In this video I show how I make a beeswax paste finish for my woodworking projects using beeswax and olive oil.
The ingredients I use are-
1 Cup of extra virgin olive oil
1 oz stick of beeswax (link to Amazon)
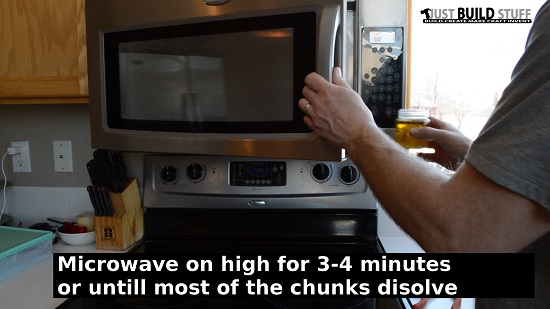
1 microwave safe container, (I use a jar that used to have Wylers Chicken Bullion Cubes) (link to Amazon)

How to Cut Wooden Wheels with a Drill Press and Hole Saw
January 27, 2015 by Kurtis
Filed under featured, Toys, Toys and Games, Woodworking
In this video I go over making wooden wheels with a drill press.
These wheels are the kind I use for the toys in the How to Make Wooden Farm Toys Book.
And for the toys on the downloadable plans page.
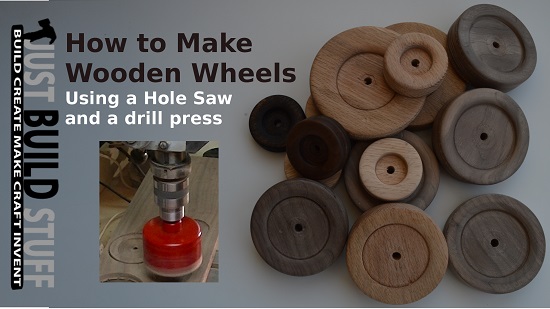
First I use a forstner bit to make an inset for the center. This is cosmetic, the forstner bit should be smaller than the final diamter of the wheel you are cutting.
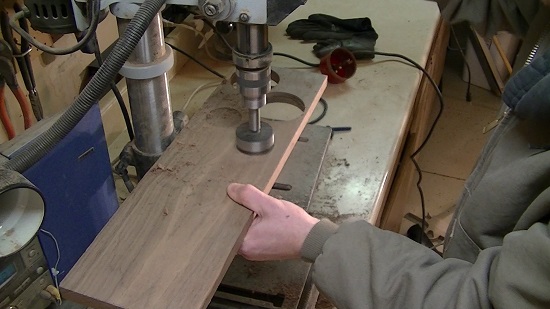
I cut out the wheel with a hole saw, the hole saw size should be about 1/4″ bigger than the size of wheel you want to cut out. This is because the hole saw is sized for its outside diameter and the wheel you cut will be the inside diameter. Take care to drill safely and slowly and follow all the manufacturer recommendations for your tools and equipment.

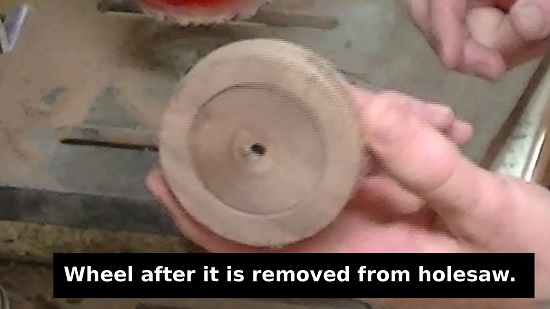
After the wheel is cut on the hole saw it is very rough. I run a quarter inch bolt through the wheel so I can chuck the wheel in the drill press for sanding.


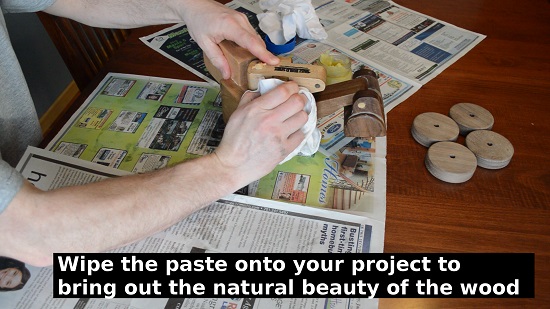
I finish my toy wheels using a beeswax/oil finish or just a cutting board/mineral oil finish.

The wheels are attached to the toy using axle pegs I purchase from Amazon or other craft part sources like craftparts.com.

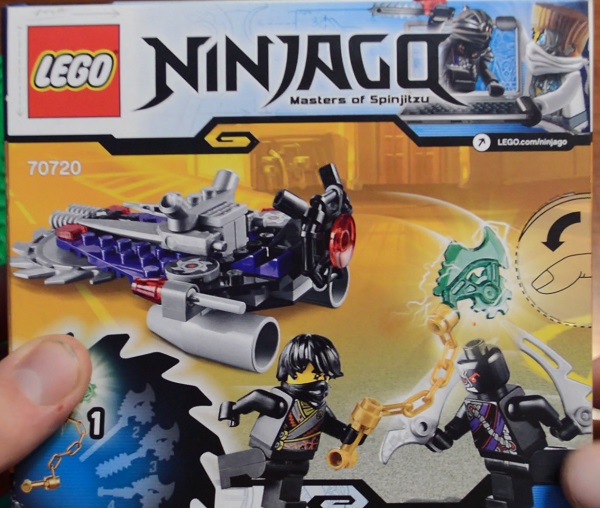
Lego Ninjago Hover Hunter 70720 Build Review
December 18, 2014 by Kurtis
Filed under build, Lego Builds, Toys and Games
The video of our build and review of the Lego Ninjago Hover Hunter 70720 .
The intro is the first stop motion footage I have ever made, so please forgive the shadows and movement flaws.
I purchased the Hover Hunter 70720 at a Fleet Farm store (http://www.fleetfarm.com/detail/lego-ninjago-hover-hunter-set/0000000208307).
The Hover Hunter 70720 is also available at Amazon. (Affiliate link)
MUSIC
The Messenger- Silent Partner
SOFTWARE
Video effects/editing- Blender
Photo editing- Gimp
Audio- Audacity