
How I Make Scroll Saw Name Puzzle Patterns
January 20, 2016 by Kurtis
Filed under build, Crafts, Scroll-saw, Toys, Woodworking
I made a few scroll saw name puzzles recently and I thought I would show you how I make them.
(link to video on youtube https://youtu.be/s8K6HgG7Iv4)
First I create a new word document. I then type in the name I want to cut and change the page orientation to landscape. I then highlight the text set it to 250 pt, right click on it and select font. Under the advanced menu I select condensed, and 30 pt. You will have to adjust the amount you condense the font based upon the size and type of font used.

I right click on the word again and select font. This time I click “Text Effects” and choose no fill.

I thin chose a solid black outline.
I print the name out and draw in the puzzle bubbles by hand.
I spray adhesive on the back of the pattern and let it dry about 5 minutes till it’s tacky.
I then press the pattern on a scrap of wood.
I use my scroll saw to cut out the letters.

I sand the letters by hand till I am happy with the finish.

Solder Snaps onto an Arduino Lillypad
I have been researching the best way to make some interesting costumes for my kids. The most popular microcontroller for wearables currently is the Arduino Lillypad. I picked one up to start experimenting with, most people sew the Lillypad to the project, but I noticed others were using snaps. I had an Arduino Lillypad I had ordered earlier and I went to Jo-Ann Fabrics and picked up a pack of snaps to see how hard it was to solder a snap to the Lillypad.
Arduino Lillypad- Link to buy at Amazon
Drtitz Snaps- Link to buy at Jo-Ann Fabrics, Link to buy at Amazon


How to Make a Sock Puppet
In an effort to amaze my children with my puppet making abilities I made this puppet from one of my old socks and now I am going to show you how I did it. You can watch the video or follow along with the pictures below.
The only tools needed for this project are a scissors, and a heat gun.

The main ingredient of this puppet is a sock, pick a sock that fits your hand and has some nice puppet like texture. Be careful not to pick a sock you are going to miss, as I did. I used one of my old sock and I love the puppet is has become, but I have to admit I also miss my socks.
The other materials I used are some felt, an old cereal box, a couple googly eyes and 2 wooden balls.
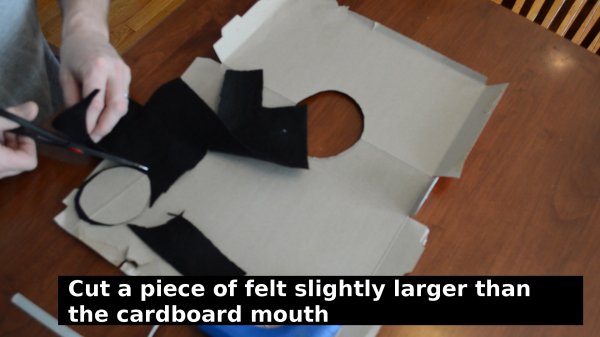
To start I flattened a cereal box and traced my fingers on one of the seams to make the shape of a mouth. I am using the cereal box paperboard to stiffen the mouth so it’s not as floppy as the rest of the sock. Test fit and trim the paperboard as needed.

After doing some final trimming to size I then cut a piece of felt slightly larger than the cardboard mouth. I then used my hot glue gun to glue the felt to the the paperboard mouth.
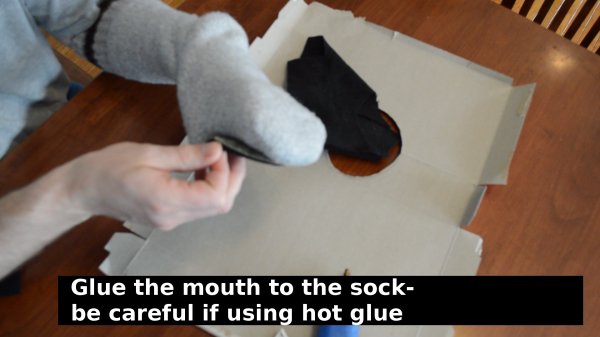
Again I did a little test fitting and finally it’s time to glue in the mouth. I applied glue to the back of the mouth and held it in position till it was dry. Now this was a thick sock that isolated my hand from the hot glue. I would not attach the mouth this way with a thinner sock, I would have either used a lower temp glue or not have my hand so close to the hot glue.
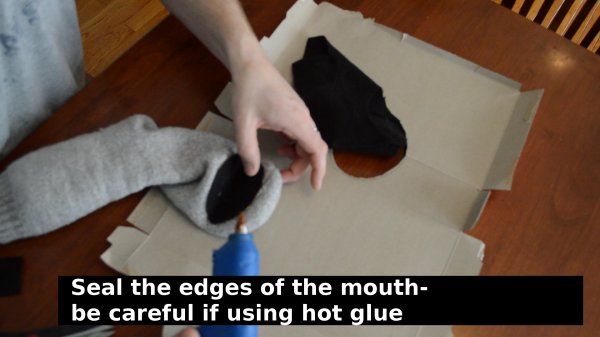
I apply a seam of glue around the mouth to keep looking good and not show the layer of felt or paperboard.
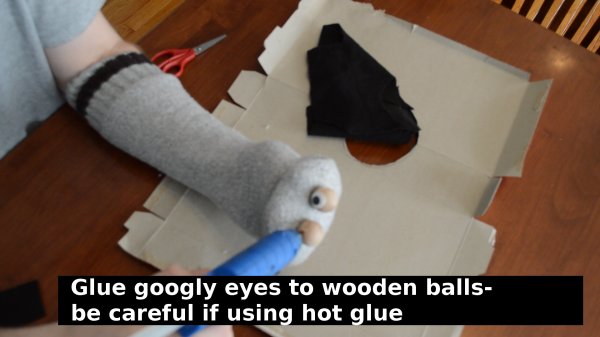
Now the finish touch is the eyes. I had 1” wooden balls in my pile of craft parts so I used those, I was originally looking for ping pong balls. I glued the wooden balls on the top of the puppet, by just shooting some hot glue on the sock and then pressing the ball on.

The googly eyes went on much the same way. As you can see a little glue and stick on a googly eye.
And that’s it the puppet is complete. Very simple but I like it. And, I assume that sooner or later my kids will stop being annoyed as I walk around the house talking in puppet voices.
How to Make Juice Box Mummies
This is a fun snack craft where you wrap tape around a juice box to make it look like a mummy.
These are the supplies we used.
- 3M Vetwrap or equivalent ( we purchased at our local Fleet Farm, but the link to the left will take you to Amazon.com)
- Googly Eyes
- Glue
- Juice Box
The video and pictures below will show you how we made the craft.


How to Make Cheesecloth Ghosts
In the video below I dunk cheesecloth into a mixture of flour and water and lay it out on bottles to dry overnight. The next day the cheesecloth had a stiff ghost like appearance, and we decorated the ghosts with faces. I hung the ghosts out on our front porch to get ready for Halloween.


