Paint the Flowers on the Wall!
The other day my family and I went to our local craft store to pick up some supplies. When we were walking around, we noticed some unpainted, flower shaped peg hooks for less than a dollar each. We knew they would look great on the wall of our daughter’s room. Plus they help us keep her stuff organized! Right now she has all of her purses hanging from them. They would also be great for holding a school bag, a coat, a bath robe, etc.
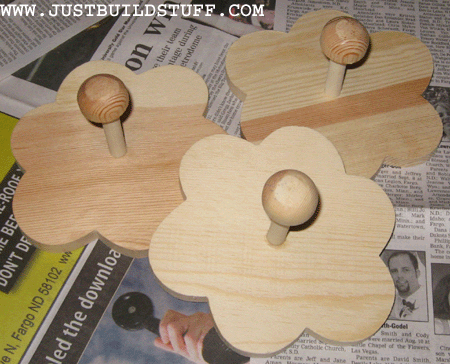
This is a fun and simple project. We didn’t actually build the flowers, but we still put a little bit of our own touch on them by painting them ourselves.

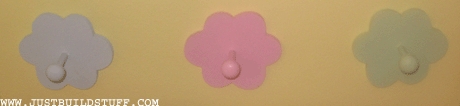
And the final picture shows how cute they look on the wall!
Origami Butterfly Dollar Bill!
Origami is something that I have always thought looked extremely interesting, taking a piece of paper and folding it into an intricate creature or object.
I had never tried origami myself until I happened by this post on Haute*Nature blog complete with good illustrations, that inspired me to attempt to create butterfly from a dollar bill. I say attempt because as you can see in the photo mine did not turn out perfect. However, I encourage you to try some origami if you have not tried it before. I thought it was fun and I am definitely going to attempt more origami projects in the future.

Trick-or-Treat Memory Bag
This post explains how to make a craft that is both practical and sentimental – a trick-or-treat memory bag. Once again, my subscription to Family Fun magazine provided me with a great idea for a holiday craft. To create this item you will need a plain canvas bag and either permanent markers or fabric paint. Simply lie out the canvas bag and let your artistic talent go to work as you draw a Halloween design. As my daughter is still very young, I am making a bag for her. I decided that I would decorate her trick-or-treat bag by documenting what her Halloween costume is each year. In the future, she can look back at all of her costumes and remember what she dressed up as in the past. Or, if you are having a Halloween party, it might be fun to provide a canvas bag to each of the partygoers and have each of them autograph the bag and list their costume.
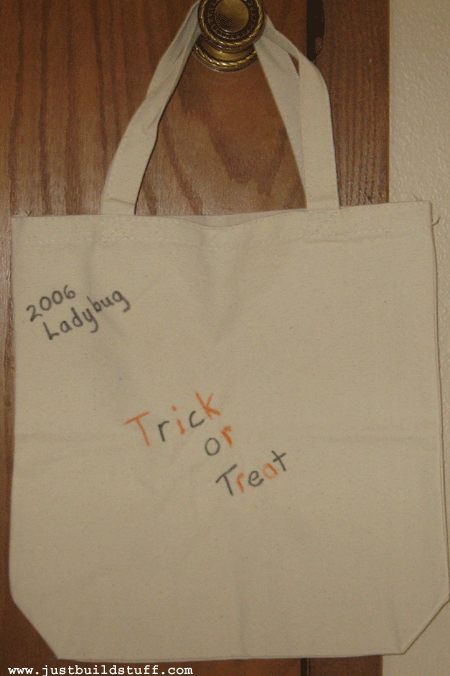
Halloween is a time of spooky fun and imagination. When I was young, I had so much fun dreaming up with what I wanted to be. This bag helps document the fun and creativity of a child and is a great tradition to add to anyone’s Halloween.
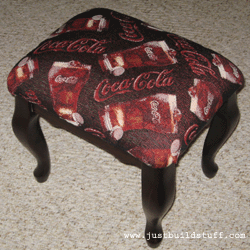
Recover a Stool With Fun, New Fabric

My sister-in-law is the queen of finding deals, and this justbuildstuff.com project is a result of her finding an incredible deal on a footstool at a rummage sale. The footstool was in great shape and she wanted to add a little flare to it by recovering it with fabric she had found that displayed a Coca-Cola theme (her favorite beverage).
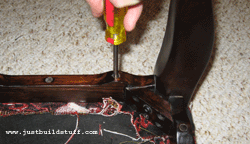
Disassemble
To begin the recovering project, we first flipped the stool over to remove the screws that were holding the seat top to the base (photo below).

Cut the Fabric
Next, we used the cover to size the fabric piece that we needed to cut (see photo below). The fabric needs overlap each side by at least an inch or two so that there is room to staple the fabric to the seat top. For this project we left the existing fabric on the seat cover because it was in good condition and would provide a good base for the new fabric. Some recovering projects may require removing the old cover and replacing the pad and batting.
.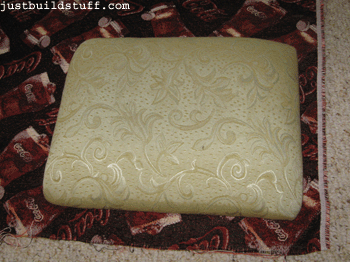
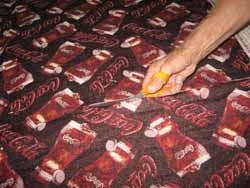
Now that the fabric is sized it is time to cut it out. To get nice straight lines, the fabric was folded to make a visible crease. The crease line was cut with a scissors as shown in the photo below.
Attach the Fabric
Making sure the design side of the fabric was facing down, we placed the seat cover onto the middle of the fabric. We then pulled the fabric tightly up over the side and put a staple in the middle, as shown in the picture below.
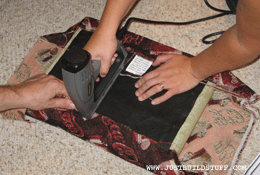
The trickiest part of getting the cover fabric to look good is in the corner as seen in the photo below. You need to make sure to fold the fabric and staple each corner in the same manner. After a corner is stapled, flip the seat over to ensure that the corners look the same as the ones you previously stapled.
Put the Stool Together
Now that all for corners are stapled and the cover is looking extraspecially wonderful with the new fabric, it’s time to reattach the cover to the legs of the stool in much the same way as they were removed. Try to find the original holes and use the original screws if possible.
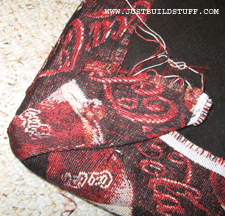
After the legs are reattached the stool is finished except for cleaning up the frayed edges on the bottom side with a scissors.
.